DETERMINING PLASTIC DENSITY OF PORTLAND
CEMENT CONCRETE WITH A NUCLEAR GAUGE
SCOPE
The plastic density of PC Concrete is dependent on the materials, proportions, air content and consolidation. For given materials and proportions, the consolidation of the concrete is an important factor in its durability.
This test procedure determines the percent rodded density by comparing the in-place density from the nuclear gauge to the corrected rodded density determined using Materials IM 340.
PRECAUTIONS
· Before operating a nuclear gauge, you must have attended a course on operation and safety at the Central Laboratory and have a current Qualified Nuclear Gauge Operator Card.
· Never touch the end of the source rod with your hand. A plastic glove and a rag should be used when cleaning the rod and the rod should be pointed away from the body during this operation.
· DO NOT use any lubricants (i.e. spray lubricants or oil) on the source rod. Central Materials personnel will perform the necessary lubrication.
PROCEDURE
A. Determination of the Corrected Standard Rodded Density
Materials IM 340 is used to determine the density of the concrete mix. Use the tamping rod, not a vibrator, to consolidate the concrete. Perform at least 1 test per each ½ day of concrete production. Determine the following:
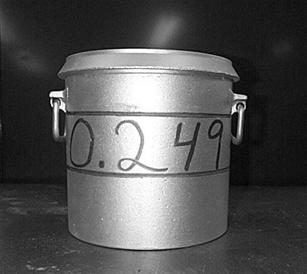
Vm, Volume of measuring bowl in cubic feet (on the side of the bowl).
W1, Weight of the measuring bowl plus concrete in pounds.
W2, Weight of the measuring bowl only in pounds.
W3 = W1-W2, Weight of Concrete in pounds.
![]()
![]()
Example:
Determined Rodded Density = 142.4 pcf
Determined Air Content = 7.4%
![]()
![]()
= 144.6 pcf
B. Test Record Forms
1. Record the following data in a field book or worksheets:
a. Date
b. Calibrated volume of the measuring bowl, Vm
c. Weight of measuring bowl, W2.
d. Weight of measuring bowl full of concrete, W1
e. Location where concrete sample was obtained
f. Corrected rodded density
C. Determination of the "In-Place" Density of the Plastic PC Concrete
1. Apparatus
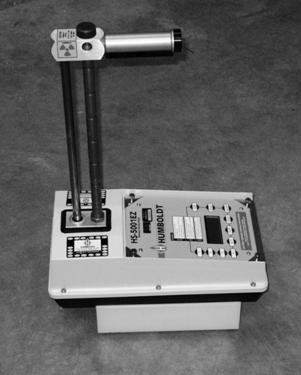
Nuclear gauge including standard calibration block and gauge instruction manual.
2. Standard Counts
a. Place the standard calibration block in a position recommended by the manufacturer to obtain standard counts.
- Allow the gauge to warm up as suggested by the manufacturer.
c. Take one automatic 4-minute standard count per manufacturer instructions. This count should be within 1% of the latest standard count established for the gauge. In the event the standard count varies by more than 1%, make a note of that number, reject that count on the gauge and then obtain another standard count. The two standard count numbers just obtained should be within 1% of each other and within 2% of the latest established standard count. If so, retain and record the last standard count taken
d. If the day-to-day shift in the standard count varies more than 2% for moisture or 1% for density, reset the gauge on the standard calibration block and repeat the procedure in 2c above.
- Keep a log of the gauge standard counts.
- Standard counts should be taken twice a day to detect any shift during daily use.
3. Test Procedure
- Prior to concrete placement, determine locations to avoid being near steel and select areas where a total minimum depth of 3 in. (76 mm) is available. Mark reference points for locations where nuclear densities are to be obtained.
- Immediately behind the finishing machine, but prior to texturing and curing operations, center the nuclear gauge on the plastic concrete surface over the test location center.
- Lower the source rod to the 2 in. (50 mm) direct transmission indent, making sure the gauge is properly seated. Do not go past the 2 inch depth with the source rod. The void created could cause the density reading to be lower.
- Pull the gauge slightly toward the scalar end.
- Obtain a 1-minute density count.
- Without retracting the source rod, put on a plastic glove and pick the gauge up and clean the end of the source rod and the bottom of the gauge with a rag to remove all paste. Retract the source rod into the gauge.
- Record the "in-place" nuclear density value (N2) from the gauge.
- Calculations
Corrected Nuclear Density = N2+ C
N2, "in-place" nuclear density in pounds per cubic foot.
C, Correction Factor (an adjustment factor for some gauges)
![]()
D.Test Record Forms
1. The following additional data will be recorded in field book or worksheets
a. Location of "in-place" nuclear density
b. “In-place" density, N2
c. Corrected nuclear density
d. % of rodded density
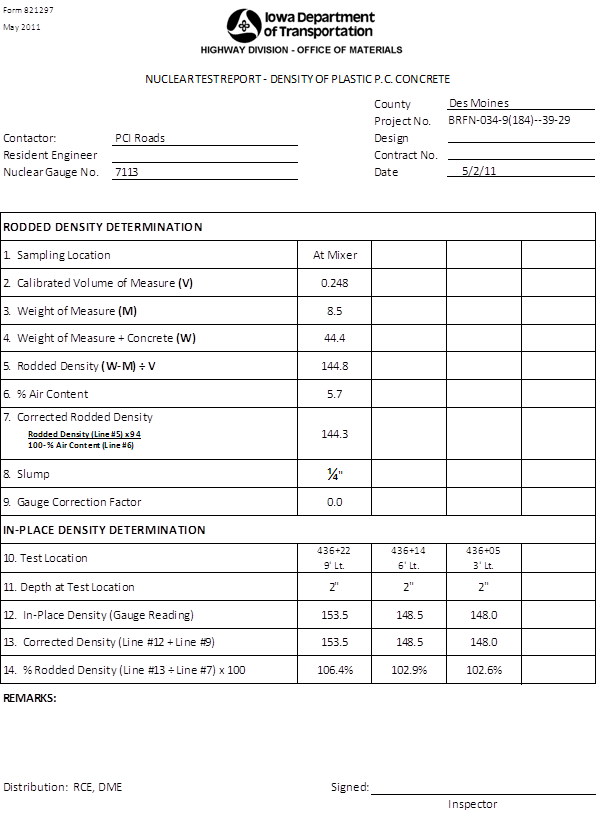
2. Report this data on Form #821297. This blank form can be found at:
W:\Highway\Materials\Nuclear gauge forms

Figure 1. Measuring Bowl Showing Volume of Container (in Cubic Feet)

Figure 2. Nuclear Gauge in Place on Standard Calibration Block
