Content Information
On this page...
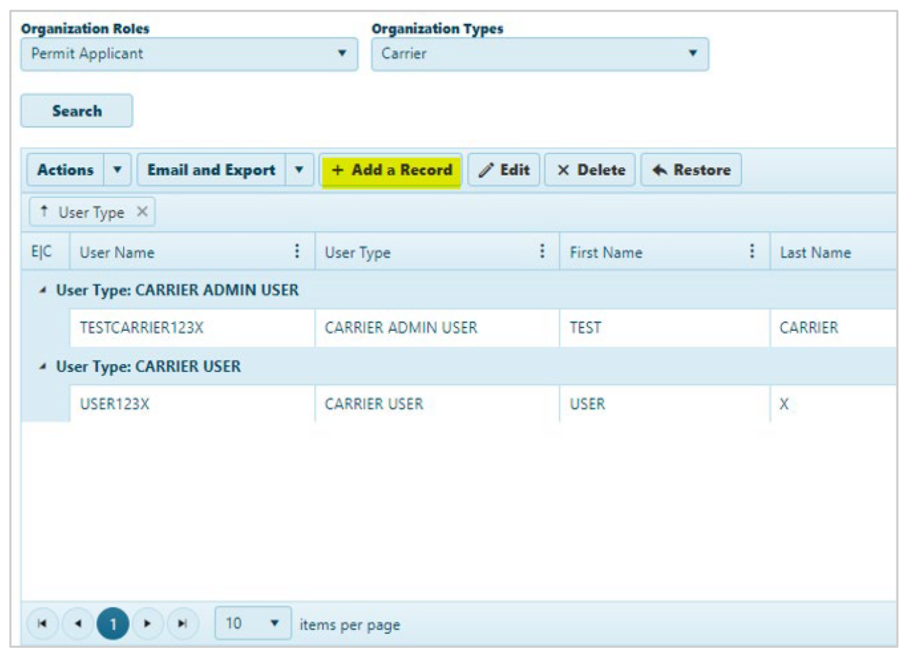
To add, remove, reset password and such for your staff members click My Admin form the menu bar. Then click Users under User Management and click the Search button to view your user list.
Back to topAdd a User
Click the Add a Record button to create new users.
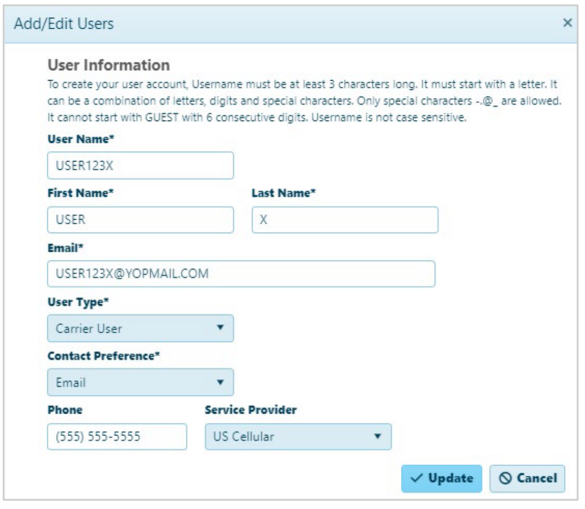
A pop-up window will appear. Complete all the boxes with an asterisk *. The username must be at least 3 characters long and start with a letter, however it is not case sensitive. It cannot start with GUEST with 6 consecutive digits. It can be a combination of letters, digits, and special characters. However, the only four special characters allowed are - (hyphen), . (period), @ (at sign) and _ (underscore).
There are two user types:
- The Carrier User or Permit Service has access to apply for permits, update personal information, view queue, vehicle library and reports.
- The Carrier Admin User or Permit Service Admin User may view and make changes to any part of the account including escrow, users, reports, and such.
Edit a User
In the table click on the name you would like to edit to highlight that user information in the table. Then click the Edit button to make changes to that existing user.

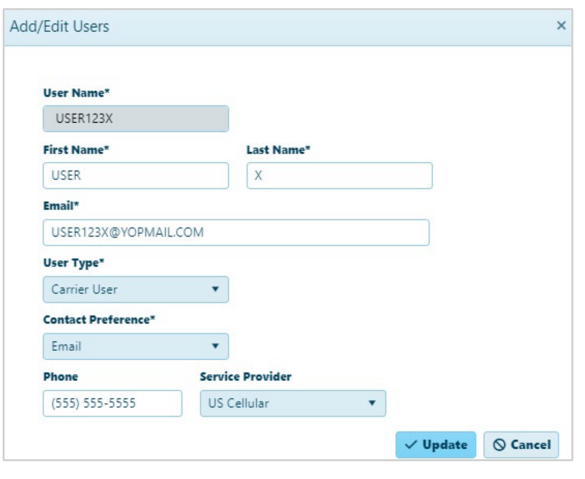
Make needed changes in the pop-up box. You will be asked to confirm the changes. If the change is to the email address the user will be sent a new activation email link. The user must then go to the email to reactive his or her account. This reactivation will ask the user to setup new password and security questions again.
Back to topDelete or Disable a User
To delete a user, click on the user to highlight the row. Click the Delete button.

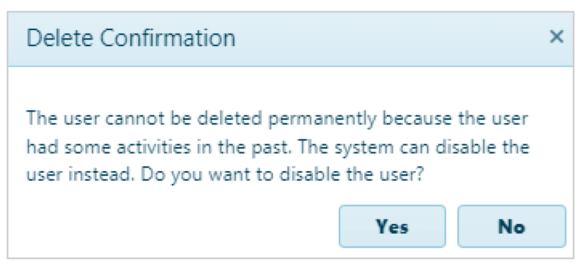
You will receive a pop-up box asking if you are sure you would like to permanently delete the users. Click Delete. If the user has been active on the company account, you will only be able to disable the user. A pop-up will appear asking if you would like to disable the user. Click yes. You may use the restore button to reactivate a disabled user.
Back to topUser Table
The table has a wide variety of options on how to sort or filter the information. You may drag a column header into the top bar to sort the information according to that particular column alphanumerically. Use the arrow by the columns heading to reverse the order. Click the X by the columns name to remove that search.
Clicking the three dots in any column headers allows you to sort the table by that column’s information alphanumerically in ascending or descending order, remove or add back columns to the table, or filter the column by the starts with or contains feature.
For example, to a user with a locked account click on the three dots next to Account Locked and filter by yes. The table will then show only users who are locked out.
At the bottom of the table, you may arrow forward and backward through the users or skip to the first or last page. You may increase the number of items viewed in the table or refresh the screen. The bottom and right-side slide scroll bars allow you to move the view to different sections of the table.
Highlighting any row in the table to utilize specific action for that one user. Then use the down arrow next to Actions to lock or unlock the users account, resend the email activation link, as well as reset the user’s password or security questions.
For example, highlight a username and click the Actions arrow. Click Reset User Questions and click Yes to the pop-up box asking if you are sure.
Click the down arrow next to the Email and Export button to send messages to users or download a listing of your company’s users into either a PDF or Excel document.
Back to top