Content Information
On this page...
Trip
Use the Trip Definition pane to plan and evaluate your route.
Generate a Trip – enter a point of origin and a destination then the system will create a route between the two
Note: Your origin and destination may be an address, a specific intersection or exit, or a state border. If both your origin and destination are outside of Iowa you must add original origin and destination on the application page.
- Pick a Trip on the Map – enter a point of origin the connecting routes and the final destination
- Load a Saved Trip – choose from a selection of previously designed and recorded route.
Use the Trip Commands pane to Modify a Trip or Manage Saved Trips.
- Modify Trip – choose this option to alter a route that has been analyzed by clicking on the map to select a new point of origin, a different destination, and if necessary, intermediate locations
- Manage Saved Trips – choose this option to add new routes to the database for re-use later, to edit existing routes, and to delete routes that you no longer need
Use the Tools pane to scan the database for specific map elements then display the results on the map. These items remain on the map when you return to the Trip Definition pane, allowing you to find specific spots more easily on the map.
- Display Limitations – use this function to search the database for Clearances, Load Rating tolerances, and/or Restrictions and then to present the results of that search on the map
- Find Intersection – use this function to search the database for intersections and then to present the results of that search on the map
- Find Item – use this function to search the database for items and then to present the results of that search on the map
- Find Keypoint – use this function to search the database for locations that have been identified and recorded via the Keypoint Manager and then to present the results of that search on the map
- Find Route – use this function to search the database for designated routes and then to present the results of that search on the map
- Find Structure – use this function to search the database for structures and then to present the results of that search on the map
- Map Options – use these options to control the color scheme of selected map items
- Restriction Information – use this function to view the features of an interfering condition
- Route Information – use this function to view route attributes stored in the database
Using the Map
The Map panel is an interactive display that features conventional controls like dragging to pan and middle mouse scrolling to zoom
Note: Use the collapse/expand grips in the center of the panel's frame to make the most of your workspace.


Generate a Trip
Use the Generate a Trip function to identify a point of origin and a destination then the system will create a route between the two.
From the Trip Definition drop-down, choose the Generate a Trip option.
The Trip Definition pane will change, reconfiguring to allow you to define your trip by choosing a start location, identifying points of transition along the way, and designating your destination.
Designate your Starting Point by clicking on the map, by entering a recognized location, or by entering a street address. Be aware that you can select any item from the Defined Trip Locations list then click the Clear button to remove that location from the list and its marker from the map.
Map:
- Your cursor is already equipped to select Start and End locations on the map.
- Click and drag on the map to pan to the desired area then use your mouse wheel to zoom in on the desired location. Be aware that you can zoom in close enough to choose a particular onramp. It isn’t essential that you zoom in to that degree, but it may be helpful.
- Left-click to set your Start point. When you click, the map panel will center on the location, illustrating the origin point with a circle.
- Pan and zoom the map to the End point of your route then left-click.
- Click the Fit Features icon on the Map’s toolbar to view the whole route.
Location:
- Designate a Start point by entering a location (for example, US 69 & Garfield Ave) in the field provided. You need only enter the first few numbers or letters in the name before the system presents you with options; choose the desired location from those options then click the Add button.
- Designate an End point by entering a location (for example, I-80 & Nebraska border) in the field provided. You need only enter the first few numbers or letters in the name before the system presents you with options; choose the desired location from those options then click the Add button.
- Click the Fit Features icon on the Map’s toolbar to view the whole route.
Address:
- Check the Enter Location by Address box then enter the street address from which you will be traveling.
- It is likely that the street address you give will not fall directly on a routable road. An alert will appear to tell you when this is the case. Click the OK button to acknowledge the alert.
- Options for a point of entry to the routing network will appear below. When you click on an option, the map will center on the chosen spot. If the entry point is desirable, click OK.
- The Enter Location by Address box remains checked, so you need only enter the street address of your destination then click the Add button.
If you receive the same Alert message as before, click OK then choose from the optional exits of the routing network before clicking OK.
The destination is marked with a red circle.
- Click the Fit Features icon on the Map’s toolbar to view the whole route.
- Your cursor is already equipped to select Start and End locations on the map.
If you need your route to pass through locations that do not fall along the system generated route, you can add those points of transition by clicking on the map, by entering a recognized location, or by entering an address.
Map:
- Your cursor remains equipped to add points of transition to your route, so you can click on the map to identify a location.
- You will notice that the newly chosen point was added to the bottom of the Defined Trip Locations list. Drag the location up to put your route in the correct order.
Location:
- Identify a point of transition by entering a location (for example, I-80 at I-235) in the field provided. You need only enter the first few numbers or letters in the name before the system presents you with options; choose the desired location from those options then click the Add button.
- When the newly chosen point appears at the bottom of the Defined Trip Locations list, drag the location up to put your route in the correct order.
Address:
- Enter the street address to which you will be traveling and follow the same procedure you used to identify your Start and End points.
- The newly chosen point appears at the bottom of the Defined Trip Locations list, so drag it up to put your route in the correct order.
- Click the Analyze button to have the system generate your trip.
- Review the results on the Analysis Results & Directions pane.
- If you wish to eliminate the current trip and start defining a new route, click the Clear Trip icon on the Map.
- Use the Override and Edit options to work around analysis complications and move the application forward.
- Override Analysis – check this box to allow a trip that failed analysis
- Override Trip – check this box to disable the other Trip page functionality, allowing the application to proceed without a successfully analyzed route
- Edit Trip – click this button if you checked the Override Trip box but you want to enter a text description of your route
- Click the Trip Commands title bar then expand the drop-down and choose the Save Trip option to store a copy of your trip for future use.
- Click the Save button to avoid losing your application.
- Click the Continue button.
Pick a Trip on the Map
Use the Pick a Trip on the Map function to identify a point of origin the desired routes and a destination then the system will use the selected points to complete the route between the origin and destination.
From the Trip Definition drop-down, choose the Load a Saved Trip option.
The Trip Definition pane will change, reconfiguring to allow you to define your trip by choosing a start location, identifying points of transition along the way, and designating your destination.
Designate your Starting Point by clicking on the map.
Map:
- Your cursor is already equipped to select Start locations on the map.
- Click and drag on the map to pan to the desired area then use your mouse wheel to zoom in on the desired location. Be aware that you can zoom in close enough to choose a particular onramp. It isn’t essential that you zoom in to that degree, but it may be helpful.
- Left-click to set your Start point. When you click, the map panel will center on the location, illustrating the origin point with a circle.
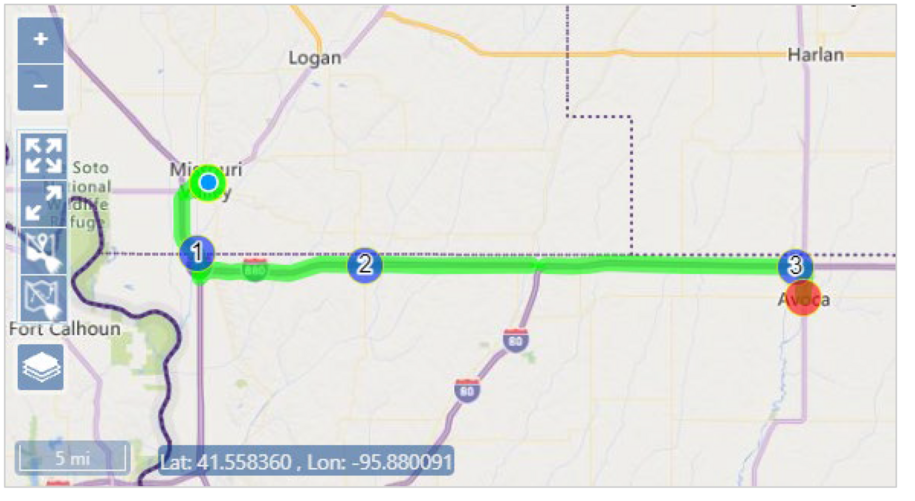
- Pick on either side of the start point to determine the trip direction. Once the direction of travel is determined the purple starting segment will turn green.
- Pan and zoom the map to the next desired route of your trip then left-click.
- Continue to pick on the route or click the Analyze button for trip analysis or the Clear Last button to undo the last selected route portion.
- Click the Fit Features icon on the Map’s toolbar to view the whole route.
- Your cursor is already equipped to select Start locations on the map.
Load a Saved Trip
Use the Load a Saved Trip feature to apply a previously defined route to your application.
From the Trip Definition drop-down, choose the Load a Saved Trip option.
The Trip Definition pane will change, reconfiguring to present a list of recorded routes. The list can be very long, so use the slider on the right side to scroll down through all the options.
Choose the desired route by clicking on the Trip Name and then click on Analyze.
The Map shows your trip.
- Click the Analyze button to have the system evaluate your trip.
- Use the Request Permit Office Review to send to the Permit Office with difficulties routing. Include the desired route in the Comment Section.
- Click the Save button to avoid losing your application.
- Click the Next button to complete the steps in your application request, choose payment options, send to Permit Office or if allowed the system will automatically issue the permit.
Modify Trip
Use the Modify Trip function to alter a route that has been analyzed by clicking on the map to select a new point of origin, a different destination, and if necessary, intermediate locations.
- After you have analyzed your route, open the Trip Commands pane and choose Modify Trip from the drop-down.
- Expand the Select Modify Location drop-down to choose whether you wish to change the route At the Start, In the Middle, or At the End.
The cursor is now equipped to mark a segment of the roadway adjacent to the existing route; move it into the map panel and left-click on the desired location.
When you click, the panel will zoom and focus on the location, illustrating the modified portion of the route with a different color.
Click the Analyze button.
The Analysis Results & Direction pane will show a Pass/Fail message, a Trip Description, and the Trip Length.
- If your analysis failed, return to the Trip Definition pane and click the Clear Last button to eliminate the final segment of the route then click Analyze. In this way, you can find the faulty segment of your route.
- Click the Add Segment button to re-equip the cursor to mark new locations on the map.
- Left-click on the desired location(s) on the map then click Analyze.
- Repeat steps a through c until you have formulated a passable route.
- Click the Trip Commands title bar then expand the drop-down and choose the Save Trip option to store a copy of your trip for future use.
- Click the Save button to avoid losing your application.
- Click the Continue button.
Manage Saved Trips
Use the Manage Saved Trips function to add new routes to the database for re-use later, to retrieve existing routes from the database, and to delete routes that you no longer need.
Adding a Trip
After you have analyzed your route, open the Trip Commands pane and choose Manage Saved Trips from the drop-down.
The Trip Commands pane will change, reconfiguring to present a list of recorded routes.
Right-click on the folder in which you wish to store the route. From the context menu, choose Add Trip.
Note: You can also create new folders by choosing the Add Category option and then adding or pasting routes into that folder.
Rename a Trip
With an application open to the Trip page, access the Trip Commands pane and choose Manage Saved Trips from the drop-down.
The Trip Commands pane will change, reconfiguring to present a list of recorded routes. The list can be very long, so use the slider on the right side to scroll down through all of the options.
Double-click on the desired route to make the name edit-able. After making the necessary changes, strike the Enter key.
The route now appears on the table under its new name.
Copy or Cut a Trip
With an application open to the Trip page, access the Trip Commands pane and choose Manage Saved Trips from the drop-down.
The Trip Commands pane will change, reconfiguring to present a list of recorded routes. The list can be very long, so use the slider on the right side to scroll down through all of the options.
- Right-click on the name of the desired trip then choose Copy or Cut from the context menu.
- Right-click on the name of the folder into which you wish to place the chosen trip and choose Paste from the context menu.
Deleting a Trip
With an application open to the Trip page, access the Trip Commands pane and choose Manage Saved Trips from the drop-down.
The Trip Commands pane will change, reconfiguring to present a list of recorded routes. The list can be very long, so use the slider on the right side to scroll down through all of the options.
Right-click on the desired route then choose the Delete option from the context menu.
The selected trip is removed from the table of available options.
Display Limitations
Use the Display Limitations function to search the database for Clearances, Load Rating tolerances, and/or Restrictions and then to present the results of that search on the map.
- With an application open to the Trip page, access the Tools pane then choose Display Limitations from the drop-down.
- Identify the limitations that you wish to scan for by checking the Clearances, Load Rating, and/or Restrictions boxes.
- Choose a specific county in which to search for limitations or check the All Counties box to scan the entire database.
- Scanning for more than one limitation or in all counties will extend the search time required, perhaps significantly.
- Enter your Vehicle Height in the field provided then click the Analyze button.
- When the database scan is complete, the results will display on the Map.
Find Structure
Use the Find Structure function to search the database for structures and then to present the results of that search on the map.
- With an application open to the Trip page, access the Tools pane then choose Find Structure from the drop-down.
Enter the first three digits of the bridge number in the field then pause while the system finds matching records. When the options appear, choose the desired bridge.
When the database scan is complete, the results will display on the Map.
Find Intersection
Use the Find Intersection function to search the database for intersections and then to present the results of that search on the map.
- With an application open to the Trip page, access the Tools pane then choose Find Intersection from the drop-down.
- Enter the first three characters of the Route Name then pause while the system finds matching records. When the options appear, choose the desired intersection.
- When the system presents the cross streets for the chosen route, select the desired intersection.
Click the Find button.
When the database scan is complete, the results will display on the Map.
Find Item
Use the Find Item function to search the database for locations and then to present the results of that search on the map.
- With an application open to the Trip page, access the Tools pane then choose Find Items from the drop-down.
Enter the name of the item for which you wish to search in the field provided then click the search button.
When the database scan is complete, the results will display on the Map.
Find Keypoint
Use the Find Keypoint function to search the database for locations that have been identified and recorded via the Keypoint Manager and then to present the results of that search on the map.
- With an application open to the Trip page, access the Tools pane then choose Find Keypoint from the drop-down.
- Click the Find by Route radio button if you wish to use a route name to find the keypoint.
- Click the Find by Keypoint name radio button if you know the designation given to the location.
- Enter the first three characters of the Keypoint Name then pause while the system finds matching records. When the options appear, choose the desired name.
- When the system presents the cross streets for the chosen route, select the desired intersection.
Click the Find button.
When the database scan is complete, the results will display on the Map.
Find Route
Use the Find Route function to search the database for designated routes and then to present the results of that search on the map.
- With an application open to the Trip page, access the Tools pane then choose Find Route from the drop-down.
The cursor is now equipped to identify your choice of route, so move it over the map and click on the desired route.
- If you choose the Route by Name option instead, you need only enter the first few numbers or characters of the name then select from the matching options.
When the database scan is complete, the results will display on the Map.
Map Options
Use the Map Options to control the color scheme of selected map items.
- With an application open to the Trip page, access the Tools pane then choose Map Options from the drop-down.
- Expand the tree structure to find the desired map element then click on the swatch to open the presentation options dialog.
- Click on the color swatch to open a color palette.
- Transparency is presented in percentages. In the example, .60 equals 60%, meaning that 40% of the background image is showing through.
- The Width is measured in pixels.
- Click OK to execute your changes.
Restriction Information
Use the Restriction Information function to view the features of an interfering condition.
- With an application open to the Trip page, access the Tools pane then choose Restriction Information from the drop-down.
The cursor is now equipped to identify the restriction, so move it over the map and right-click on a red portion of the route then left-click the Get Restriction Information button.
The restriction report will display in the Tools panel.
Route Information
Use the Route Information function to view route attributes stored in the database.
- With an application open to the Trip page, access the Tools pane then choose Route Information from the drop-down.
The cursor is now equipped to identify your choice of route, so move it over the map and click on the desired route.
When the database scan is complete, the results will display.
Using the Map
The Map panel is an interactive display that features conventional controls like dragging to pan and middle mouse scrolling to zoom
Note: Use the collapse/expand grips in the center of the panel's frame to make the most of your workspace.
- Zoom In – click this icon to increase the magnification level by one increment; you can also scroll the middle mouse button up to zoom in
- Zoom Out – click this icon to decrease the magnification level by one increment; you can also scroll the middle mouse button down to zoom out
- Fit Features – click this icon to zoom and focus the map on your route
- Clear Features – click this icon to remove the segments of an unfinished trip from the map
- Clear Trip – click this icon to remove and complete trip from the map
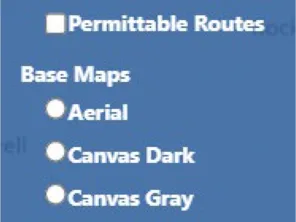
- Base Map – hover your cursor over this icon to choose from a list of map presentation options
- Base Map options – click the radio button for the desired map presentation
- Scale – values are displayed in miles and feet
- Current cursor coordinates – displayed values indicate the latitude and longitude of the point on the map over which the cursor is currently hovering