
Content Information
On this page...
This section was developed using information provided by NCHRP Report 641, “Guidance for the Design and Application of Shoulder and Centerline Rumble Strips”, as well as recommendations made by InTrans report “Iowa Lane Departure Strategic Plan, Chapter 2: Centerline Rumble Strips” approved at the Highway Division Management Team (HDMT) meeting on February 25, 2010.
Back to topConventional Rumble Strips, Sinusoidal Rumble Strips and Rumble Stripes
Conventional rumble strips are transverse grooves milled into a pavement surface. See Standard Road Plans PV-12 and PV-13 for details. The noise and vibration that results from vehicles crossing over them alerts drivers that corrective action may be needed. Figure 1 is a photograph of a rumble strip.
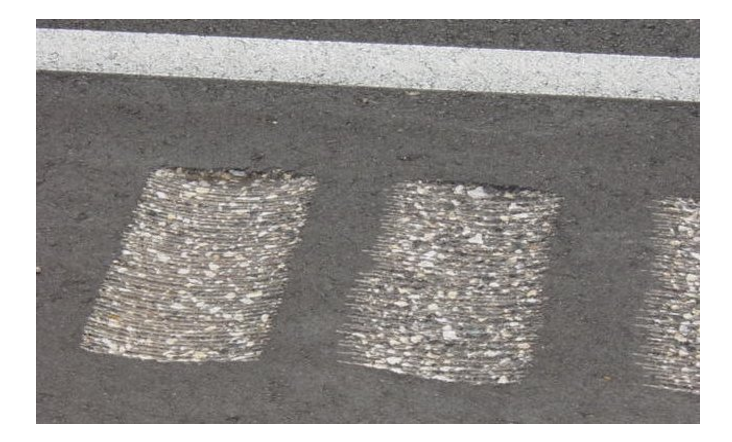
Figure 1: Conventional rumble strip.
Rumble stripes are rumble strips that have pavement markings placed over them after milling or diamond grinding. Figure 2 is a photograph of a rumble stripe.
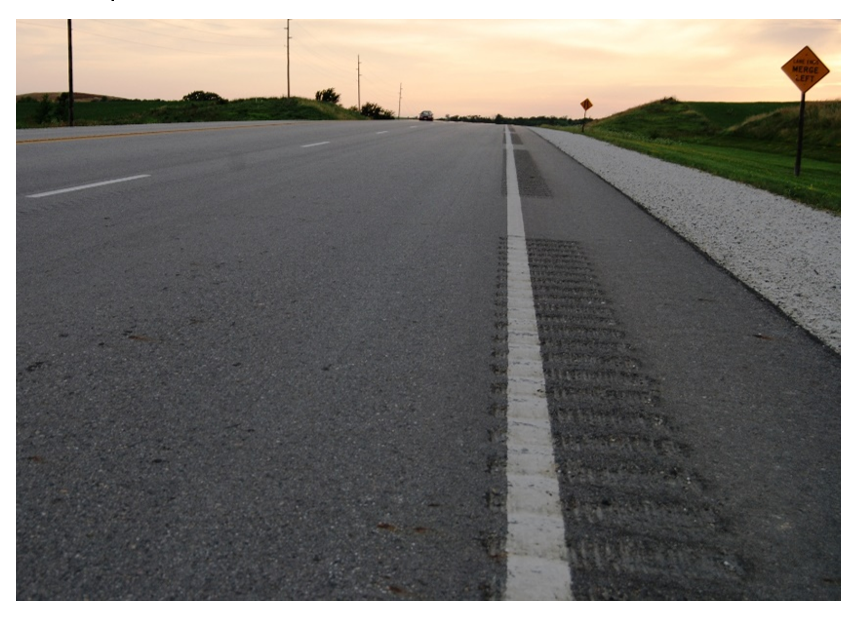
Figure 2: Rumble stripes.
Sinusoidal rumble strips, see Figure 3, also create noise and vibration from vehicles crossing over them. They have the advantage that they are quieter to the surrounding area when compared to the conventional pattern. This can be beneficial in urban areas or in rural areas when there are businesses or residences near the roadway. The noise reduction is accomplished by using a sinusoidal (undulating) pattern that varies in depth from 1/8 inch to 9/16 inch. Because this pattern is recessed completely below the pavement surface it is also well suited for use with pavement markings to create rumble stripes.
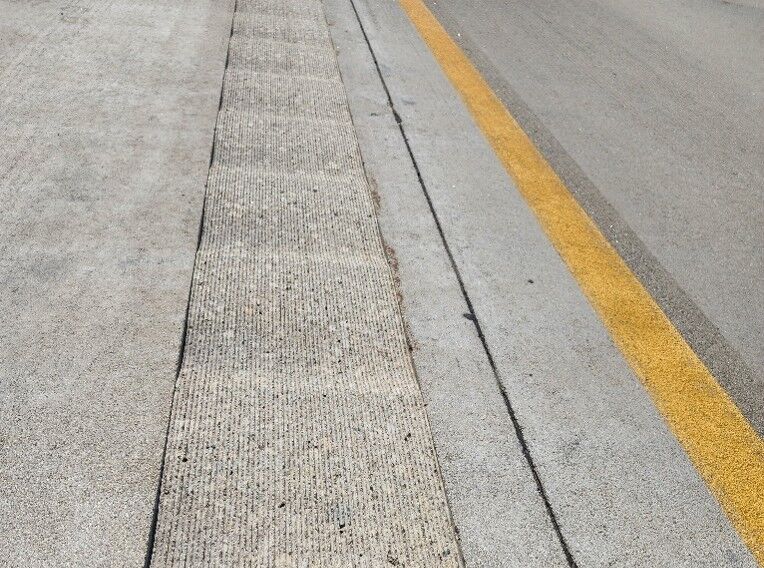
Figure 3: Sinusoidal rumble strip.
For the purpose of general discussion, this section will refer to both rumble strips and rumble stripes as rumble strips.
Back to topShoulder Rumble Strips
Single vehicle run-off-road crashes account for a large percentage of traffic fatalities. Shoulder rumble strips (see Standard Road Plan PV-12) have demonstrated a tremendous ability to reduce run-off-road crashes.
Shoulder rumble strips must be placed on all new or existing Primary rural roads with paved shoulders at least 2 feet wide. They may also be placed on roads with narrower shoulder widths, including roads without paved shoulders where, in the opinion of the designer, the benefits of the rumble strips would outweigh their operational constraints. In these situations, the width of the rumble strip may be reduced. It can be combined with a pavement marking to produce a rumble stripe.
The standard shoulder rumble strip width is 12 inches. This width should be used wherever feasible. In some circumstances, a narrower width (preferably no less than 8 inches, but absolutely no less than 6 inches) may be beneficial to accommodate bicyclists and/or horse drawn carriages, or to maximize lane width on narrow pavements (e.g. to accommodate two 11 foot lanes on a 24 foot wide pavement). If placing rumble strips is not feasible, rumble stripes should be considered as an alternative.
On highways where bicyclists are legally allowed, a gapped rumble strip pattern consisting of 48 feet of rumble strips followed by a 12 foot gap will be provided to allow cyclists to cross over, see Standard Road Plan PV-12. Figure 4 is a photograph of a gapped shoulder rumble strip.
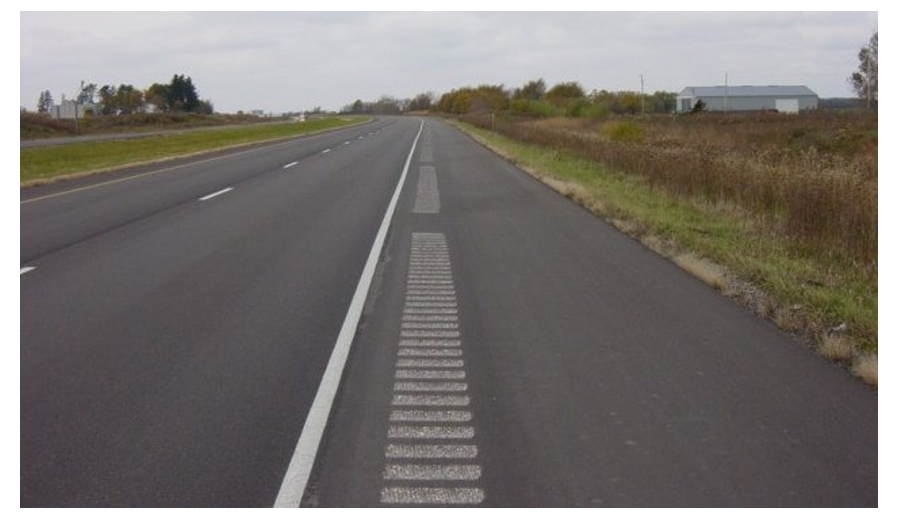
Figure 4: Gapped shoulder rumble strip pattern.
A minimum of 4 feet of pavement should be provided outside of the rumble strip to accommodate bicyclists, see Figure 5. A minimum of 5 feet should be provided if the shoulder is adjacent to a barrier or a railing.
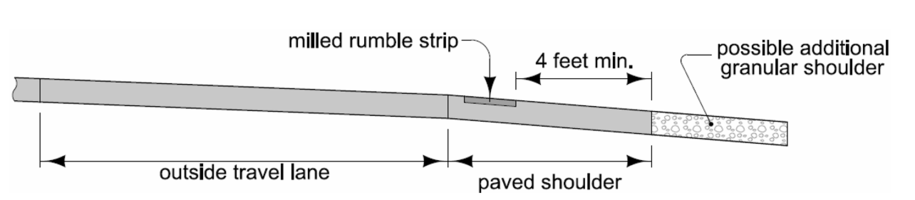
Figure 5: Bicycle accommodation on paved shoulders.
This may require the use of narrower shoulder rumble strips or placing the shoulder rumble strip within the pavement marking (creating a rumble stripe), or both.
Expressways should have a gapped pattern on the outside shoulders, but have continuous (ungapped) rumble strips on median shoulders. Interstates, however, will have continuous rumble strips on both outside and median shoulders.
Back to topCenterline Rumble Strips
Centerline rumble strips (see Standard Road Plan PV-13) have demonstrated the ability to reduce multi-vehicle cross centerline crashes and single vehicle run-off-road left crashes. Rumble strips placed along the centerline are in line with the centerline pavement markings, so they become rumble stripes. Figure 4 is a photograph of centerline rumble strips.
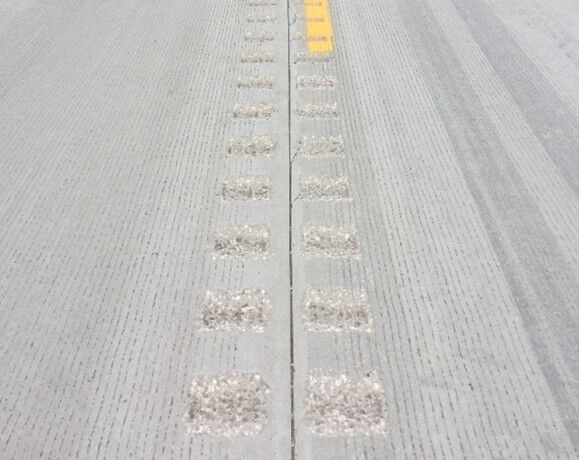
Figure 6: Centerline rumble strip pattern.
Centerline rumble strips must be placed on all new or existing two lane Primary rural roads with at least 11 foot lane widths. They may also be placed on roads that do not meet this qualification, but have experienced a history of cross centerline crashes.
Back to top
Choosing a Rumble Strip Pattern
Depending on the roadway type and whether it is in a rural, transitional, or an urban setting the Tables 1 and 2 should be used to select the appropriate rumble strip type.
Back to top
Gaps
Shoulder rumble strips should be gapped at pedestrian crossings, driveways, side roads, ramp and loop terminals, and bridges as shown on Standard Road Plan PV-12. Gap centerline rumble strips at intersections and bridge approaches as shown on Standard Road Plan PV-13.
In some situations, shoulder rumble strips may need to be omitted to mitigate noise near homes or businesses. This is especially important for roadways that transition from rural to more densely populated areas. NCHRP Report 641 suggests the end distance prior to residential or urban areas be 660 feet.
Back to topInstallation of Rumble Strips
Rumble strips can be installed using a milling process or a diamond grinding process. The milling process uses a milling head on a machine to install the rumble strips. This process works well on HMA pavements but often causes damage to PCC pavement surfaces and joints. Therefore, this milling should not be used on PCC pavements. Because of damage to the joints on PCC pavements, the sinusoidal pattern should not be installed with the milling process.
The diamond grinding process uses stacked diamond blades on a grinding machine to install the rumble strips. This process is better suited for use on PCC pavements and causes less damage to the pavement joints and the pavement surface. This is especially important when using the sinusoidal rumble strip pattern because the rumbles do cross the transverse joints.
Back to topBidding Shoulder and Centerline Rumble Strips
Tab 112-10 is used to tabulate shoulder and centerline rumble strips. Typically, they are bid as beginning of construction to end of construction. Gaps such as those shown on Standard Road Plan PV-12 and PV-13 do not need to be accounted for in Tab 112-10. However, longer gaps, e.g. those to mitigate noise near homes or businesses, may need to be accounted for in Tab 112-10, depending on the length of the gap relative to project length.
Rumble strips on new PCC pavements/overlays should be bid using the diamond ground process and rumble strips. On projects where short segments of PCC pavement exist that need rumble strips, consideration could be given to installing the rumbles with the milling process.
HMA pavement/overlays should be bid using the milled process. Rumble strips in HMA surfaces will also need to be sealed with an appropriate sealer.
Back to top