
Content Information
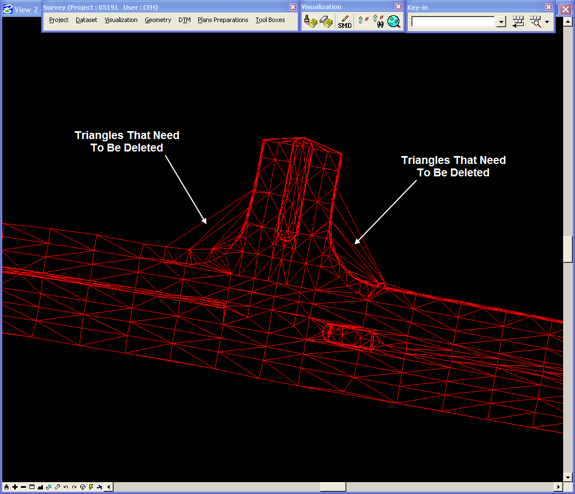
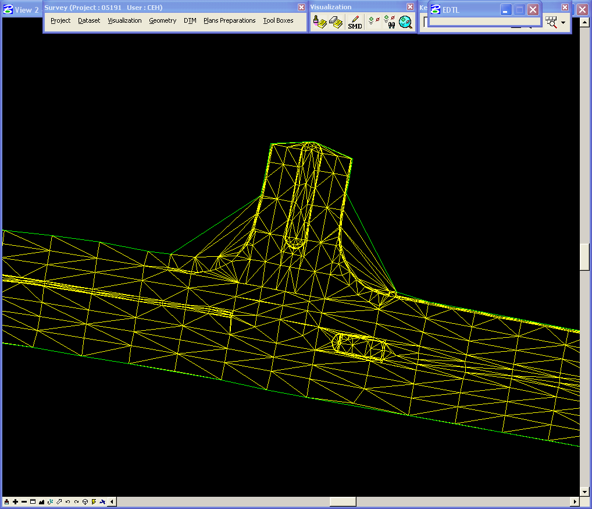
Most of the time when creating a TIN file, the maximum side length that is set for the triangles provides a compromise between drawing all of the triangles necessary to adequately show the area, while eliminating as many unwanted and unnecessary triangles as possible. The picture below shows a Field_DTM model displaying the TIN triangles. The triangle side length was set so that all necessary triangles were drawn. But, around the intersection, some unnecessary triangles were also drawn. These triangles should be eliminated due to the fact that they are showing existing ground details in the TIN where existing ground was not surveyed.
Geopak Survey Menu
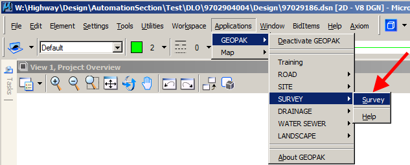
Start GEOPAK from the MicroStation menu by selecting Applications > GEOPAK > Activate GEOPAK, as shown at the right.

After GEOPAK has been activated, access the GEOPAK Survey menu from the MicroStation menu by selecting Applications > GEOPAK > SURVEY > Survey, as shown at the right.
The Survey tool bar should display, as shown at the right.

To remove the unwanted triangles -
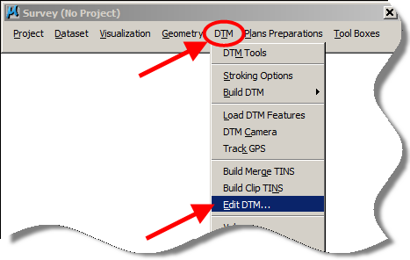
- On the Survey menu bar select DTM > Edit DTM….
This will open both the Display Settings dialog box and the TIN Edit Tools dialog box.
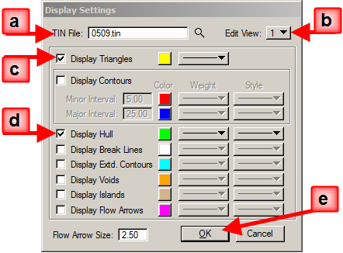
- You must take care of the Display Settings dialog box before you can move on to editing the TIN.
- Make sure that the name of the TIN File to be edited is correct.
- Change the Edit View value to 1.
- There should be a check mark (R) next to Display Triangles, as this will make the triangles visible for editing.
- Another check mark (R) should be next to Display Hull. The TIN “Hull” is the outermost boundary of the TIN. You can change the attributes, such as color and weight, of any of these objects to suit your preferences.
- Click the OK button.
- The “yellow triangles” and the “green hull” that were set in the Display Settings dialog box now appear in the file. These items are only temporarily visualized and are not actually drawn into the file. You can turn some MicroStation levels off to make the triangles easier to see and to edit.
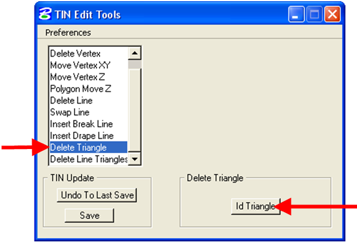
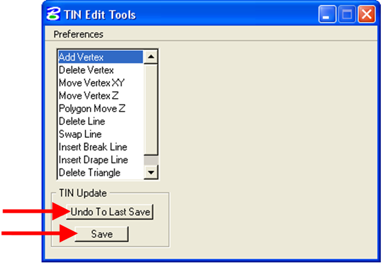
- To delete the unwanted triangles, select the Delete Triangle option in the TIN Edit Tools dialog, then click the ID Triangle button, as shown at the right.
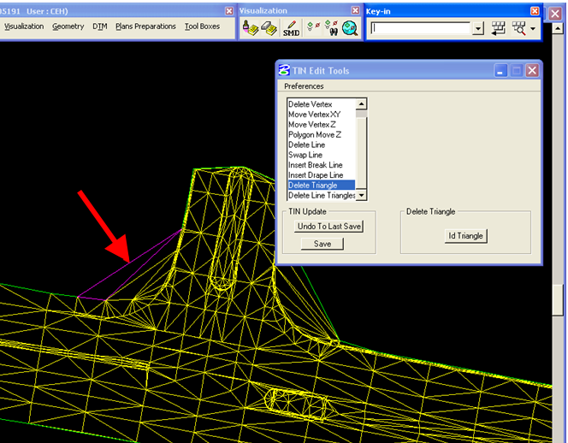
- Left-click (select) one edge of an unwanted triangle that is to be deleted and the selected triangle will become highlighted, as shown below. After the correct triangle has been selected, accept it by left-clicking anywhere else in an empty area of the MicroStation window, (not on top of another MicroStation element), and the selected triangle will be removed. An easy way to select elements from the unwanted triangles is to start selecting at the outside edge of the outermost triangle, as shown by the arrow below. It is more difficult to select the correct element from the internal lines in the triangulated drawing because each visual element consists of two sides from adjacent triangles. If you left-click (select) the wrong triangle, then un-select it by right-clicking the mouse, (which is the reset button). This will cause the highlighted element to become un-highlighted.
The ID Triangle button must be clicked again to delete another triangle.
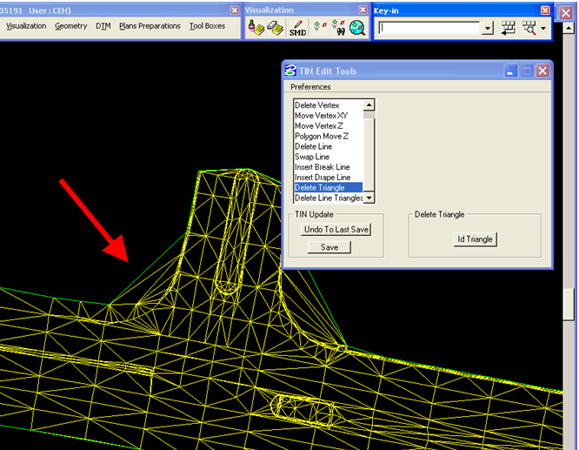
- After you have accepted the highlighted triangle by clicking for the second time, the triangle will disappear, as shown by the arrow below. If you are trying to delete the outermost triangle you can use the green TIN Hull as a guide to determine if you deleted all of the triangles. If the hull shifts to a new position, all triangles are gone. If the hull does not move, there may be a small triangle on the outside edge that is covered up by the TIN Hull and you will have to locate and delete it also.
- The yellow triangles are not actually drawn into the MicroStation file and the changes being made are being done to the TIN file. The changes must be saved to the TIN file by clicking the Save button on the TIN Edit Tools dialog. If you delete the wrong triangle, you can use the Undo To Last Save button to bring it back. But, it will also bring back all other triangles that have been deleted after you saved the last time. Make sure to click the Save button often when you are satisfied that that your TIN edit is progressing correctly.
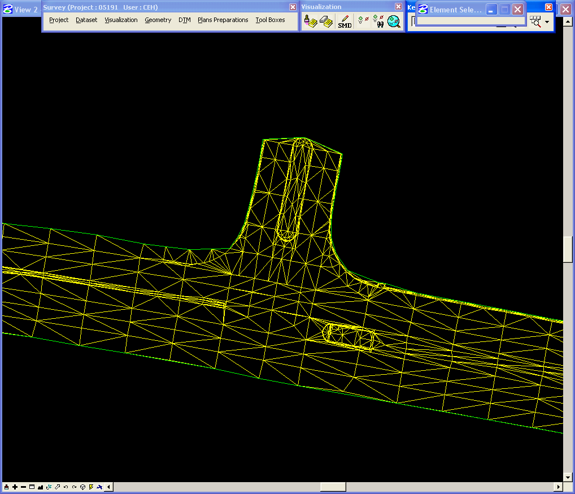
- The intersection with all unnecessary triangles removed is shown below.
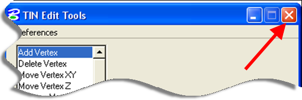
- After you are done editing the TIN, click on the “X” in the upper right corner of the TIN Edit Tools dialog to close it.
- As soon as you update the MicroStation window, the yellow triangles and green hull will disappear. You must delete the old TIN triangles if they are drawn into the DTM model on MicroStation level phoSurveyTin. You can then redraw the triangles into the model using the Load DTM Features dialog box.