Content Information
On this page...
A dataset is a file, or files, containing survey information that is loaded into GEOPAK. Each dataset may contain the work from just one day, or the work for an entire project. After the project has been created, the first dataset can be created.
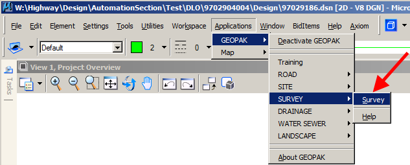
Start GEOPAK from the MicroStation menu by selecting Applications > GEOPAK > Activate GEOPAK, as shown at the right.

After GEOPAK has been activated, access the GEOPAK Survey menu from the MicroStation menu by selecting Applications > GEOPAK > SURVEY > Survey, as shown at the right.
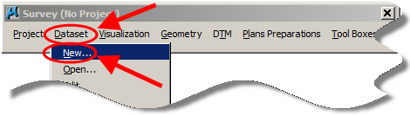
The Survey menu should display, as shown below.
From the GEOPAK Survey menu tool bar, select Dataset > New.
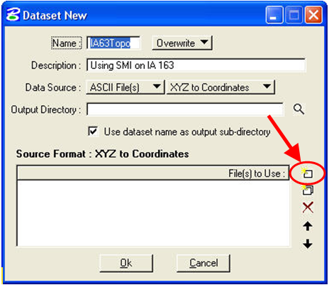
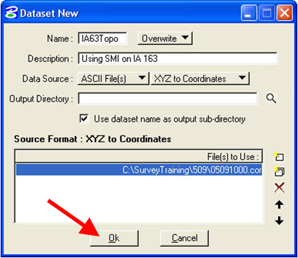
The Dataset New dialog will appear and will display values that are based on the previously established preference settings. To select the file containing the survey information, click the Dataset Add Source File to List button, as shown at the right.
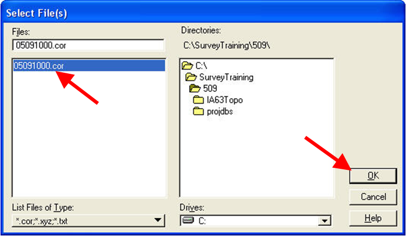
Select the file then click the OK button.
When all data areas display the correct information click the OK button.
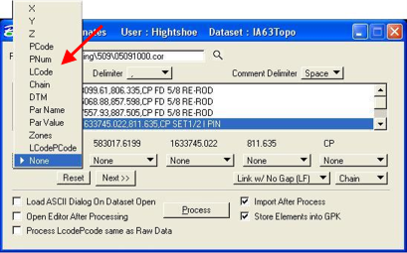
After clicking the OK button above, the “XYZ to Coordinates” dialog will display. You must “tell” GEOPAK what each column of data represents. (Column data explained below.) There are many options available, as shown by the pop-up selection list and the red arrow at the right.
Each blue highlighted “row” of data on this dialog represents several columns of data, as shown below by the red ovals and arrows. The column data and headings for the highlighted row are as follows:
300 PNum
583017.6199 Y
1633745.022 X
811.635 Z
CP PCode.
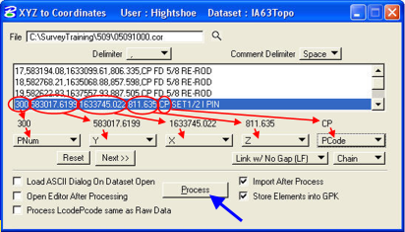
For a standard XYZ ASCII file, you should use the settings shown in the dialog at the right. After all of the columns have been identified, click the Process button as shown by the blue arrow.
This Alert dialog explains how the chains will be named. Click the OK button to continue.
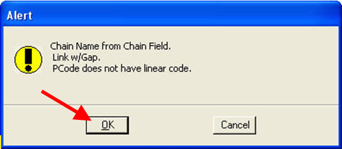
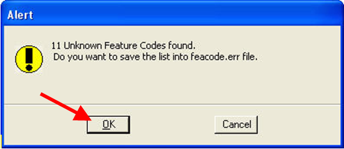
The next Alert dialog will display if any feature codes have been used that are not in the “smd” file. Click the OK button to continue.
If a point name has already been loaded into the “gpk” file from another dataset, the “Over Writing Information in GPK” dialog will display. You must select what action to take to resolve the issue then proceed by clicking one of the three buttons at the bottom.
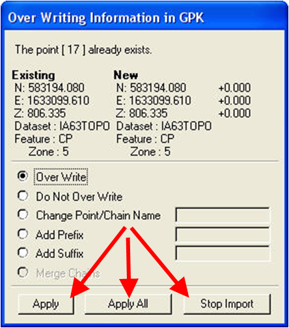
After the “Importing Points …” and “Importing Chains …” dialogs have come and gone, the survey information will have been plotted into the MicroStation file. If there were any unknown feature codes, the “Over Writing …” dialog shown above will display again.

If a final OK button appears, click the OK button to complete the process.
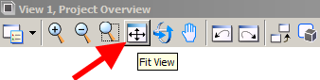
You can use the MicroStation Fit View command to display all of the survey information on a single view screen.
An example of a Fit View of the survey information is shown below.